Showing posts with label card. Show all posts

Friday, June 19, 2015

Mario Make a Wish Birthday!

Today's card is a fun kids card featuring a Punch Art "Mario" from Mario Brothers.  I created this for one my son to take to a Marion Cart birthday party.  I can tell you everything I look at this I smile.


I used a series of circles both plain and scalloped to create this Mario.  Foam adhesive helped me achieve dimension.  The radial checked background is the perfect backdrop for this Mario Cart race inspired card.  I hope to do a tutorial soon, to show you the shapes and steps in making this fun card.


Happy Crafting,
Melanie

Friday, June 6, 2014

Free Father's Day Card Printable

I always struggle with creating masculine cards for my husband, dad and father-in-law.  So I wanted to share with you a free printable (for personal use only) that I created if you struggle like me.  This Father's Day Card was created with different Free fonts that I downloaded and imported into Photoshop.  There I  sized and placed them to my liking.


Here is how you can make one of your own with this free download.  Click here to download file.
After you print the file onto card stock you will need to pull out your paper cutter or scissors would work too. 


I trimmed at at 5.5" mark on the long side.  The right hand portion will be your card base with the "Happy Father'd Day" sentiment on the inside.  
  

Score and fold this portion of the the card. 


Now I trimmed down the front of the card to 5.25" x 4" and matted a black piece of card stock that was 1/16" wider.  This picks up the black lettering on the card and it feels very masculine.  Here is where you can adjust accordingly to your personal liking.  You could add your the recipients favorite color or leave white for clean look.  I place some foam tape on the back to give this layer some depth.

I hope this inspire you to make this card or put your own fonts to work in a program like photoshop.

Enjoy and happy crafting,

Melanie


Tuesday, May 20, 2014

Affordable End of the Year Teacher Note Card Set

If you are like me you like a good deal and I love Target's $1 section.  I happened upon these cute black and white note cards sets.  My wheels instantly were turning on how I could take these up a notch.  You may have seem my other note card portfolios or gift card bouquet that I have done in the past for my son's teachers.  I now have three sons and our family is going many directions, so I don't have the time to do projects from the past.  This note card set will be equally special, but done during one or two afternoons while the kids are napping or still at school.


Here is the card set I purchased from Target's $1 bin:


Next, I used some Big Shot Alphabet Dies to cut out the monogram letters.  I cut out 9 for each; 8 for the note cards and one for the front of the portfolio.


Note Card Portfolio Dimensions:
8" H x 9.5" W
Score at 2" along the 9.5" section
Score in half at 4.75"

I hope you enjoyed this project and it inspires you to make your own.  They make a great gift or thank-you for anyone in your life.  I went back to Target and picked up a few more sets for my shelf.


Happy Crafting,
Melanie

Friday, October 4, 2013

Have Yourself a Merry Little Christmas Series - Part Five

Welcome back to Part Five in the "Have Yourself a Merry Little Christmas" Series featuring Stampin Up's "Merry Little Christmas" in the 2013 Holiday Mini.


Today's is the final post in series and I have sure had fun creating with this set.  For this card I features the "Merry Little Christmas" stamp set along with the "Beautifully Baroque" set that is new in the catalog this year.  The background is stamped with the Beautifully Baroque set in Versa Mark ink.  I then stamped a craft brown piece of card stock and cut in out with the Window Frame framelit.  Added some bakers twine, faceted button and ribbon to finish it off.


If you missed out on Part OnePart Two, Part Three or Part Four of the "Have Yourself a Merry Little Christmas" series, please check them out for more inspiration on this stamp set.
Happy Crafting,
Melanie

Tuesday, August 6, 2013

Beautifully Baroque Christmas Cheer

Here is another Christmas card using the "Beautifully Baroque" stamp set from Stampin Up.  If you missed my Christmas card using this stamp set from yesterday, click here Beautifully Baroque Seasons Greetings.  


For this card, I cut out the center portion and made it into a festive Christmas ornament.  The "Christmas Cheer" is from the lovely "Sweet Essentials" stamp set.  I may try another one using some sparkly red embossing powder to give it a little kick.


Come back tomorrow for another Christmas card using Beautifully Baroque stamp set.
Happy Crafting,
Melanie

Monday, August 5, 2013

Beautifully Baroque Seasons Greetings

It seems like the summer has really snuck past me this year, so I am already starting to make some Christmas cards for friends and family.  I always like to come up with inventive ways to use my stamps.  For this card I used the new "Beautifully Baroque" stamp set from Stampin Up.  


Here is how I made the layered scallops.  I first stamped the image and then cut the image in half.  Then using 1 3/4" circle punch I followed the curved line to punch around.  I layered them up and added some satin ribbon.  


This could really be a universal card for any occasion  by changing the sentiment and colors.  I hope this inspires you to use your stamps in new ways.  

Happy Crafting,
Melanie

Friday, May 31, 2013

Monogrammed Note Cards - End of the Year Teacher Gift

Today's post is showcasing the hand stamped cards that are going into the Monogrammed Note Card Portfolio that was in yesterday's post, click here to check it out if you missed it.


Here are the cards the monogrammed cards that I created for the portfolio.  I had so much fun making these and using different stamps.  The following sets were used: Everything Eleanor, Field Flowers, Betty's Blossoms, Madison Avenue and Label Love.

Everything Eleanor

Field Flowers

Betsy's Blossoms

Madison Avenue

 Label Love

It was so fun to play around with stamps that I haven't used in awhile.  So, I hope this inspires you to create your own personal monogrammed gift.
Happy Crafting,
Melanie

Check out my most recent Teacher Note Card Portfolio, click here.


Thursday, May 30, 2013

Monogrammed Note Card Portfolio - End of the Year Teacher Gift

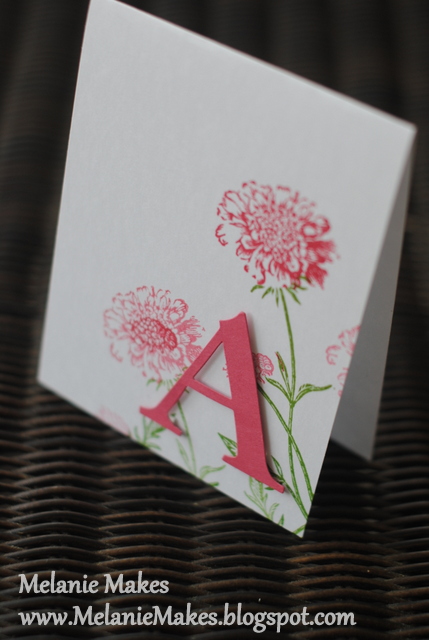
Since the school year for my children is coming to a close, I decided to make these monogrammed note card portfolios for them.  I got to use lots of my stamps, some old and some new in the process.  In this post, I am going to focus on the Note Card Portfolio Holder.  In the following post, I will show case the monogrammed cards I included.


Can you believe that this folder is just made from a simple 8.5" x 11" piece of card stock?  Yes, it is that easy.  Here is a 
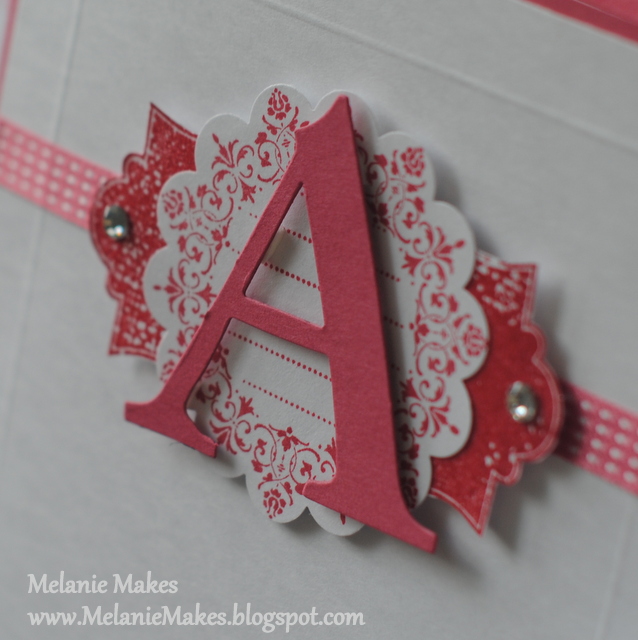
video from Angie at ChicnScratch that explains the details on it.  For the front I used the Everything Eleanor stamp set and Serif Essentials Alphabet Bigz Die that I got off the Stampin Up Clearance Rack recently.


Using the Primerose Petals stamp pad, I stamped the background stamp then heat embossed with clear embossing powder.  It really gives that little extra dimension with the shine.  The rest is pretty simple with punching and the big shot.  And of course a little bling to accent the Monogram.


To get the details on the cards, please see my post "
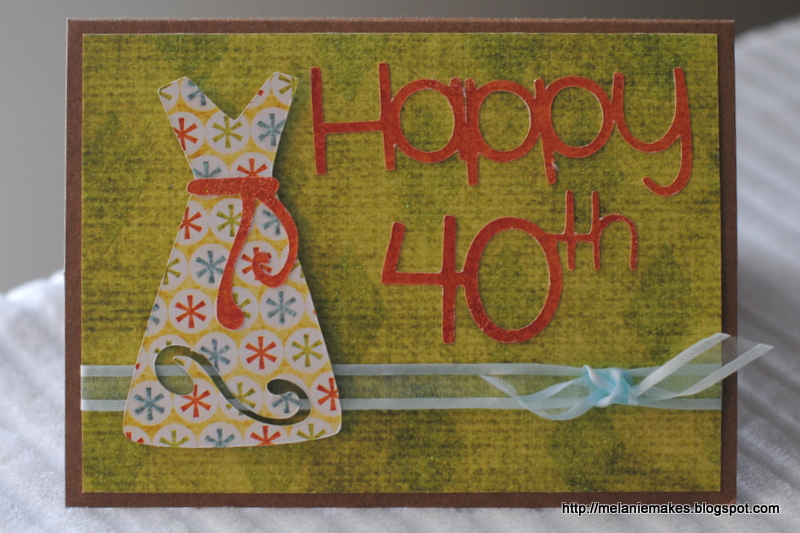
here".  This is a perfect gift for many occasions, here is another version I did for Christmas gifts.  I hope this gives you some inspiration for your own projects.
Happy Crafting,
Melanie

Friday, January 4, 2013

Everything Eleanor Christmas - Part Four


I know it is after Christmas, but I still wanted to share this card with you.  This is my final card of my personal challenge in using a non tradition stamp set to create Christmas cards.  I really enjoyed using the Everything Eleanor stamp set from Stampin Up.  This is the one that I choose to mass produce.  Simple and elegant, just the way I like it.


Happy New Year,
Melanie


Thursday, December 20, 2012

Everything Eleanor Christmas - Part Three

This is my third card of my personal challenge in using a non tradition stamp set to create Christmas cards.  Everything Eleanor stamp set from Stampin Up can really produce many different looks.  I also used the Al la Cart, "Bold Snowflake".  This color scheme features Baja Breeze and Lucky Limeade.  


Merry Christmas,
Melanie

Monday, December 17, 2012

Everything Eleanor Chirstmas - Part One


I decided to challenge myself and try something new, use a none Christmas stamp set to create Christmas cards.  For this challenge I used the Everything Eleanor stamp set from Stampin Up.

This is the most simple card I created with the stamp set.  The most time consuming part is cutting the red accent piece in the background.  That didn't take too long, so I could see this as being easily mass produced.


The center snowflake is done with a retired Stampin Up snowflake punch.


Please come back tomorrow and check out another Christmas card using this stamp set.  
Thanks for stopping by,
Melanie

Tuesday, December 11, 2012

Primerose Snow Flurry

This card is a card I cased from Stamp with Heather.  She is a Stampin Up Artisan winner and has great projects.

For this card, I decided to go for a more nontraditional Christmas color scheme.  I used Stampin Up's Primerose Petals.  I really love the soft feel this gives the card.  The Snow Flurry die accents the embossed snowflake banners in the background.  Very simple and easy to create.


Happy Crafting,

Melanie

Friday, December 7, 2012

Winter Snow Flurry Christmas Card


This is another Winter Snowy Christmas Card and I just love how this turned out.  This is another version of the card that I posted yesterday
 

This was also created with the Snow Flurry die from Stampin Up, Woodgrain embossing folder and the Bold Snowflake.  The Bold Snowflake was is one of Stampin Up's new single stamps that coordinates with the Blossom Punch.  To finish off the card I used some Cherry Cobbler twine.


Enjoy your Christmas Crafting,
Melanie


Thursday, December 6, 2012

Snowy Seasons Greetings


 I am enjoying getting into the Christmas Spirit and started making some Christmas Cards for family and friends.  This one was created with the Snow Flurry die from Stampin Up and the Woodgrain embossing folder.  Both of the are new and can be found in the Stampin Up Holiday Catalog.

I will be showing you another Christmas card using the Snow Flurry die tomorrow.
Happy Crafting,

Melanie


Monday, December 12, 2011

Fantabulous Cricut Challenge Blog - Rolling in Ribbon


Hello Everyone and Happy Monday! I hope that everyone had enjoyed their Thanksgiving and are safely back home. How about getting back into the swing of things with a Challenge Me Monday over at Fantabulous Cricut Challenge Blog.

This week's Challenge Me Monday is #90 - Rolling in Ribbon: use ribbon somewhere on your project along with your Cricut cut.


Recipe:
Stampin Up Real Red Paper, White card stock & green glimmer paper S
Christmas Tree from Christmas Solutions at 4.40" using the Gypsy
Real Red 1/4" Gross Grain Ribbon
Martha Stewart Score board

Did you know that you can link your own "Rolling in Ribbon" project to the Fantabulous Cricut Challenge Blog? We would love to see what you come up with and thanks for stopping by on Challenge Me Mondays.

Melanie

Tuesday, January 25, 2011

My Pink Stamper - Birthday Card Challenge

Here is my most recent challenge entry for My Pink Stamper and Robyn's birthday.  I have a special friend that will be turning the big 40, so I though what a perfect to make a special card for her.


I used the Gypsy Wanderings Dress cut out at 3" and the Happy 40th was welding from the Simply Sweet font.  I am looking forward to our celebration dinner and hope she enjoys her card.


Tuesday, January 4, 2011

My Pink Stamper Design Team 2011 Challenge

So, I have only been using my Cricut Expression for a few days now and I am going to be entering my first submission in becoming a design team member for Robyn's, "My Pink Stamper".  I have been following her for several months and if you are interested you can find here at http://www.mypinkstamper.com/ .  Robyn has proposed the following challenge:

To make a card, scrapbook page, or other Cricut project with your favorite cartridge using Robyn's favorite colors; pink, green, brown and an optional color of our choice.

I decided to use the "Paper Pups" cartridge along with the grass from the "Plantin SchoolBook" cartridge for my niece's Happy Birthday card.  Both of these came with my Cricut machine.  For the base of my card I used a 8 1/2" x 5 1/2" piece of  Dark Brown cardstock which I folded in half making a 5 1/2" x 4 1/4" card.  Next, I adhered a 5 1/8" x  3 7/8" piece of Bubble Gum cardstock and a 4 3/4" x 3 5/8" piece of Blue cardstock together.  I sewed a decorative pink zig-zag stitch around the top and two sides.  Then I attached the three layers of green grass that were cut from the "Plantin SchoolBook" cartridge along with the green ribbon at the bottom of the grass.  The card was then ready for the playful birthday pup, presents and happy birthday from the "Paper Pups" cartridge.  Finally, adhere this portion to the Dark Brown card stock and Voila you have the cutest birthday card.  Next project is to create my son, Bryan's, first birthday invitation. 


Cutting Machine:
Cricut Expression
Cartridges:
Paper Pups
Plantin SchoolBook
Cardstock:
The Paper Company - Dark Brown from the Cypress Fashion Colors pack
The Paper Studio - Medium Brown from the Earthtone pack
AC Moore - Spring Green, Grass Green, Blush, Bubble Gum, Blue
Embellishments:
Hobby Lobby - Scrap Pack Ribbon
Clark's Pink Thread