Wednesday, October 30, 2013

Creepy Crawly Halloween Teacher Favor


Do you ever wonder what to do with those cute little sticky note pads that you see in the $1 at your favorite store?  Well, I just love to give them for gifts or favors.  This year I found some really cute Halloween ones at my Target store and I knew they would make the perfect little gift for my son's teachers.

I cut the craft card stock 3 1/4" x 6 5/8" and then scored at 3 1/4 from both edges.  These dimension might vary depending on the sticky note pad, so always measure twice and cut once.  Then I just adorned the front with some layered paper and the retired Stampin Up set, "Batty for You".


For the packaging, I used a clear bag and topped it off with embossed craft paper.  I cut the topper using Stampin Up's, "Labels Collection" framelits.


Great quick gift for those you want to know you appreciate them.  If you are looking for more ideas you can stop by and see what I did for the teachers last year, Click Here.
Happy Crafting,

Melanie

Saturday, October 26, 2013

Driving Me Batty


This year is the year of the Bat in my family and my three sons are going to play the part.  
I love to do simple sewing and this really fits the bill, because with three boys you know there isn't a lot of free time.  This cute design is from Alpha Mom website, you can visit her site to download a PDF of the steps. 

 I made a different mask which I got from Blog 5 to 9.  


Together, they make the perfect bat.  As far as time, this only took me about an hour.  The second costume went even faster. Need something
quick and easy, look no further. 


Happy Crafting.
Melanie

Friday, October 4, 2013

Have Yourself a Merry Little Christmas Series - Part Five

Welcome back to Part Five in the "Have Yourself a Merry Little Christmas" Series featuring Stampin Up's "Merry Little Christmas" in the 2013 Holiday Mini.


Today's is the final post in series and I have sure had fun creating with this set.  For this card I features the "Merry Little Christmas" stamp set along with the "Beautifully Baroque" set that is new in the catalog this year.  The background is stamped with the Beautifully Baroque set in Versa Mark ink.  I then stamped a craft brown piece of card stock and cut in out with the Window Frame framelit.  Added some bakers twine, faceted button and ribbon to finish it off.


If you missed out on Part OnePart Two, Part Three or Part Four of the "Have Yourself a Merry Little Christmas" series, please check them out for more inspiration on this stamp set.
Happy Crafting,
Melanie

Thursday, October 3, 2013

Have Yourself a Merry Little Christmas Series - Part Four

Welcome back to Part Four in the "Have Yourself a Merry Little Christmas" Series featuring Stampin Up's "Merry Little Christmas" in the 2013 Holiday Mini.


Today's post is very similar to yesterdays in the elements that I used.  This one is a little more festive and sparkly which is perfect for the Holiday.  I set the sentiment off with the snowflake from the Snow Flurry Bigz die and the Season of Style cut with an Apothecary Accent framelit.  For the background I used a sponge dauber and versa mark ink that I then heat embossed with red glitter embossing powder.  I really love the sparkle to set the tone for this card.


If you missed out on Part OnePart Two or Part Three of the "Have Yourself a Merry Little Christmas" series, please check them out for more inspiration on this stamp set.
Happy Crafting,
Melanie

Wednesday, October 2, 2013

Have Yourself a Merry Little Christmas Series - Part Three

Welcome back to Part Three in the "Have Yourself a Merry Little Christmas" Series featuring Stampin Up's "Merry Little Christmas" in the 2013 Holiday Mini.


In today's post, I am featuring a rustic card.  I set the sentiment off with the snowflake from the Snow Flurry Bigz die and the Season of Style cut with an Apothecary Accent framelit.  The wood grain embossed background adds the rustic feel.


If you missed out on Part One or Part Two of the "Have Yourself a Merry Little Christmas" series, please check them out for more inspiration on this stamp set.
Happy Crafting,
Melanie

Tuesday, October 1, 2013

Have Yourself a Merry Little Christmas Series - Part Two

Welcome back to Part Two in the "Have Yourself a Merry Little Chirstmas" Series featuring Stampin Up's "Merry Little Christmas" in the 2013 Holiday Mini.

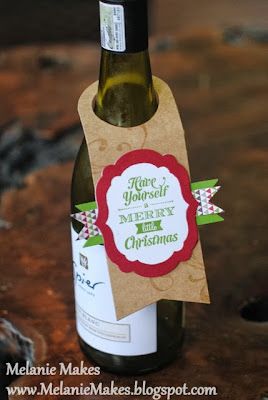
For today's project we are featuring a festive wine bottle tag.  This tag would be easy to create on your own, but I used Papertrey Ink's "Wine Bottle Tag" die.  A modification of this was also show in the card created in yesterday's Part One of the "Have Yourself a Merry Little Chirstmas" series.  Please check it out.


The other stamp set in the background is one of my favorites from the "Everything Eleanor" stamp set and the the Labels collection framelits on top with a touch of the Season of Style DSP.


I hope you enjoyed this project and please come back tomorrow for Part 3 in the series.
Happy Crafting,

Melanie

Monday, September 30, 2013

Have Yourself a Merry Little Christmas Series - Part One


Looking for inspiration using the "Merry Little Christmas" stamp set from Stampin Up's 2013 Holiday Mini catalog?   I really fell in love with this set and have created several projects to help inspire you this holiday season.  Today's project is this beautiful Christmas card.


This Christmas card features the very popular banner style with Stampin Up's Season of Style designer series paper, Merry Little Christmas and Everything Eleanor stamp sets.  The larger banner was cut using Papertrey Ink's Wine Bottle Tag Die, with the top portion cut at score line.  The smaller banner was cut from another Papertrey Ink Die called, Tag Sale #5.  They layer and compliment each other really well.  This could easily be cut out if you don't have the dies.  I added a little bit of hemp twine to top it all off.
  

I hope you enjoyed Part One of the "Merry Little Christmas" series and please come back tomorrow to see the next project.
Happy Crafting,

Melanie


Thursday, September 19, 2013

Masculine Thinking of You

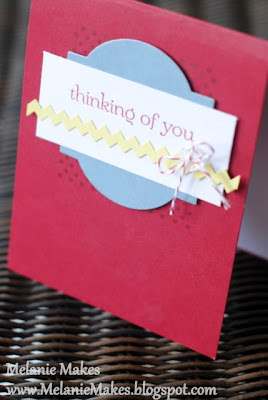
I really have been enjoying the "Sweet Essentials" stamp set from Stampin Up.  I just love the font!  Here is a card I was inspired from a Stampin Up post.  It was awhile back, but I thought I would try my take at it.  This is my masculine version of a birthday, thinking of you card.  


I used a window frame framelit that I cut in half and the cheveron is from the Tasteful Trim die.


Hope you enjoy and as always Happy Crafting,
Melanie

Wednesday, September 18, 2013

Banner Butterfly Trio

Welcome to the butterfly trio of cards.  I took a simple sketch to start the basis for my three designed.  I used the large banner as in beautiful blue paper adorned with butterflies.  The butterflies seen here are done with Stampin Up punches.  They are a great "go to" for cards, because who doesn't like butterflies.
  

Another great thing about these cards is that you could pair it with almost any sentiment; birthday, anniversary, sympathy or congratulations.

Here are a few more close ups:


Happy Crafting,
Melanie

Thursday, August 15, 2013

Dotted Birthday Present

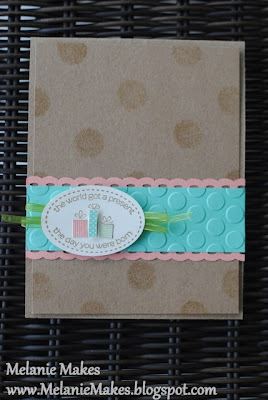
I think I have found my new favorite color combo with Stampin Up's new In Colors.  I love the embossed Coastal Cabana and the scallop Crisp Cantaloupe poking from behind.  I used a sponge dauber and some versa mark ink to create the dotted background.  The sentiment is from Happiest Birthday Wishes retired hostess set.


Happy Crafting,
Melanie


Wednesday, August 14, 2013

Create-a-Cupcake - 10 Minute Craft Dash #23

Today I wanted to try something new and challenge myself with  Pretty Pink Posh's, 10 Minute Craft Dash Challenge #23 Birthday Theme.

This was so much fun and a little stressful at the same time.  I looked at my Pinterest boards and got an idea of what I wanted to do.  I set up my supplies and boy did I dash. 

Here is the card that I made using Stampin Up's Create a Cupcake stamp set and coordinating punch.


I can't wait to do this again, such fun!
Happy Crafting,
Melanie


Friday, August 9, 2013

Banner Birthday - Make a Wish

I have never really created a banner card before and have been inspired to try from seeing all my fellow crafty friends posts.  Here is my first attempt.  


I used the "Hearts A Flutter" stamp set and framelits as well as "Sweet Essentials" for the sentiment.  This is one of my favorite sentiment sets from Stampin Up.  The center piece flower is from the "Blossom Party" die. 


Have you made a banner card lately?  I hope this inspires you.
Happy Crafting,
Melanie

Thursday, August 8, 2013

To My Friend - Mojo Monday 305

It has been a long time since I entered any challenges, so I thought I would enter Mojo Monday's Contest #305.  Here is the sketch for the challenge and please feel free to play along too.

Since Fall is around the corner, I wanted to create a card that used richer colors.  I decide to break out my DSP from Stampin Up and make this card (I tend to hoard it).  This paper speaks fall to me and is from the recently retired Cafe Comfort collection.  I used the flowers from the Everything Eleanor stamp set and the sentiment is from Friendly Phrases.


Happy Crafting,
Melanie


Wednesday, August 7, 2013

Textured Beautifully Baroque Merry Christmas

For today's Christmas card, we took a slightly different take on the ornament that we cut out from Stampin Up's "Beautifully Baroque" stamp set.  If you missed my two previous Christmas card posts using this stamp please check them out; Beautifully Baroque Seasons Greetings and Beautifully Baroque Christmas Cheer.


For this card and my previous card I cut out the ornament shape from the "Beautifully Baroque" stamp.  I used the curly stamp from "Everything Elenor" to set the background and the embossed with a writing embossing folder.  I used the "Merry" from "Teeny Tiny Wishes" stamp set along with the coordinating punch.


I hope you enjoyed this series using the Beautifully Baroque stamp set.  I can't wait to create more using it.

Happy Crafting,
Melanie

Tuesday, August 6, 2013

Beautifully Baroque Christmas Cheer

Here is another Christmas card using the "Beautifully Baroque" stamp set from Stampin Up.  If you missed my Christmas card using this stamp set from yesterday, click here Beautifully Baroque Seasons Greetings.  


For this card, I cut out the center portion and made it into a festive Christmas ornament.  The "Christmas Cheer" is from the lovely "Sweet Essentials" stamp set.  I may try another one using some sparkly red embossing powder to give it a little kick.


Come back tomorrow for another Christmas card using Beautifully Baroque stamp set.
Happy Crafting,
Melanie

Monday, August 5, 2013

Beautifully Baroque Seasons Greetings

It seems like the summer has really snuck past me this year, so I am already starting to make some Christmas cards for friends and family.  I always like to come up with inventive ways to use my stamps.  For this card I used the new "Beautifully Baroque" stamp set from Stampin Up.  


Here is how I made the layered scallops.  I first stamped the image and then cut the image in half.  Then using 1 3/4" circle punch I followed the curved line to punch around.  I layered them up and added some satin ribbon.  


This could really be a universal card for any occasion  by changing the sentiment and colors.  I hope this inspires you to use your stamps in new ways.  

Happy Crafting,
Melanie

Wednesday, July 31, 2013

Moving Forward Birthday

Here is a festive birthday card that I made for my sister.  I used the retired Moving Forward stamp set from Stampin Up.  I really love circles and trying to combine them in new ways.


I punched out the window with a circle punch and accentuated it with the Window Frame collection framilits.


Happy Crafting,

Melanie

Tuesday, July 2, 2013

Yippee, Make a Wish!

This adorable birthday card was made for my nephew's first birthday.  I thought the retired, Moving Forward, stamp set worked great for this card.  The sentiment is from Sweet Essentials, one of my new Stampin Up favorites.


Since this was a first birthday card, I wanted it to be fun.  I can't help but smile when I see this little frog and the bright colors really make the card cheery.  Perfect for a first birthday or any other.


Don't forget to stamp the inside of your cards and your envelopes too.  It just adds that extra touch.
Happy Crafting,
Melanie

Monday, July 1, 2013

Relax, Happy Retirement!

This Retirement card was made for my Father in Law.  He is retiring this week from the EPA after 35 years. When starting this card I realized how few masculine stamps I have.  I finally decided on this relaxing theme, when I saw these palm trees from a pirate stamp set I bought to do my son's birthday.


I decided that the "HOT" Polaroid trend would work great for this card.  I used my Cricut to cut mine out, but there are many die cuts available.  I think it sets the perfect scene for this retirement card, I just want to leave it all behind and go myself.


I hope this inspires you to try your hand with the Polaroid trend.

Happy Crafting,
Melanie

Wednesday, June 5, 2013

Strawberry Fun Birthday

I don't know about you, but I love this time of year.  I especially love visiting our local strawberry patch with my boys.  This visit inspired the SWEET birthday card.


To create the strawberries on this card I used the heart from the "Hearts a Flutter" framelits and ran them through the a polka dot embossing folder.  The green portion is from an EK Success flower punch that I folded in half.  These strawberries are backed by Stampin Up's "Window Frames Collection" framelits.  This sentiment banner is something that I typed and printed from our home computer.  I added a scallop trim and sewed on for some interest.


This sure makes me hunger from some delicious sweet strawberries.
Happy Crafting,
Melanie