Showing posts with label leaves. Show all posts

Friday, October 31, 2014

Fall Thank You for Teachers

Today, I wanted to share with you the Fall Thank You I sent to my son's teachers.   These are cute post it note holders with a fall theme.  I give these out often to not only teachers, but friends and family.


For the chevron background I used Stampin Up's "Positively Chevron" Background Stamp in Versa Mark Ink and Clear Embossed it.  The fall leaves are from a retired set from Stampin Up called, "Gently Falling".

I colored the leaves with distress inks and was pleased with how they turned out for my first try at using them.

I personalized the back with a punched out heart and stamped Bryan with Lawn Fawn's "Violet ABC's".


Super simple thank you for almost anyone.  If you missed my post yesterday for the Halloween Treat Bags stop by here.

Happy crafting,
Melanie

Monday, October 10, 2011

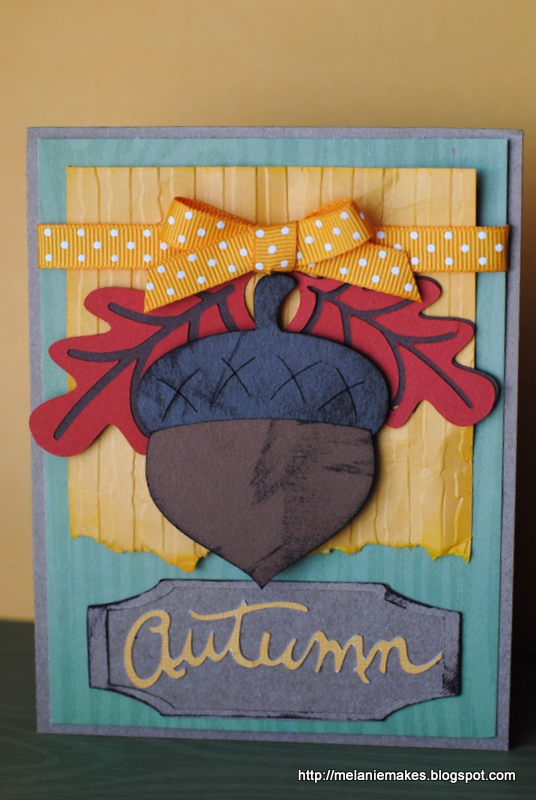
Falling for Autumn


This Fall card was inspired by some acorns my son collected in a park behind our house.  He just had a ball picking them up and throwing them into a lake.  We even took some home for hours a more fun with a dump truck.

With the acorn inspiration in hand, I was off to create this card.  Here is the recipe:
Cuts:
Acorn; 2.75" from "B is for Boy"
Leaves; 2" & 1.75" from "B is for Boy"
Autumn; 3.5" from "Stretch Your Imagination"
Frame Base; 3.5" x 1.25" (sized using Gypsy) from "Gypsy Wanderings"
Frame Outline; 3.5" x 1.25" (sized using Gypsy) from "Gypsy Wanderings"
Tools:
Cuttlebug; "Distressed Stripes" 
Materials:
Kraft Brown Card Stock (11"x4.25" folded in half)
Kraft Brown Card Stock
Brown Card Stocks
Yellow / Orange Card Stock (3.75" x 3.5")
Orange Paper
Green Pattern Paper (4" x 5.25")
Yellow poka dot ribbon
Stampin Up Chocolate Brown Ink

Cut the list of cuts above in desired card stock and assemble pieces.  Fold 11"x4.25" card base in half.  Cut a 4" x 5.25  piece of pattern paper and 3.75" x 3.5" of  orange / yellow card stock.  This last piece will need to be embossed with "Distressed Stripes", rip the bottom off and then crumpled into a ball for additional texture.  Adhere these layers together and tie ribbon towards the top of  the card.  Adhere this to the card base and now it time to start layering all the elements.  The acorn and the Autumn frame edges were inked.  The acorn was popped up with foam adhesive.  Lastly, I place the bow over where the leaves connect.  Voila, a cute Autumn card!


I hope you enjoyed this card, it is one of my Fall  favorites.  I am entering this into the My Craft Spot Design Team search.  Clink the link to check it out or even audition yourself.
Have a great week,
Melanie

Thursday, September 15, 2011

Inking It Up Crazy Design Team - Least Used Catridge

The challenge for this weeks Inking It Up Crazy Design Team was fairly simple, to use our least used cartridge.  For me this was the "Stretch Your Imagination" cartridge which came with my Cricut Expression.  It actually has some great images for all occasion on it and I should really use it more often.

Here is a Fall card I made with it.


To create this I used my Gypsy and welded some simple shapes and the tree.  I cut out my layers and used the distressed stripes cuttlebug folder for the tree trunk.  Then I ran it through again ontop of the folder to flatten it out to make it more subtle.  I just love this time of year with the crisp cool mornings and of course some football.

Please check out what the other ladies have made for this challenge over at Inking It Up Crazy.
Melanie