Showing posts with label plantin schoolbook. Show all posts

Monday, May 21, 2012

End of the Year Teacher Bouquet


I can't believe my son graduated from preschool this week and to think that next year he will be on his way to kindergarten.  I wasn't as sad as I thought I would, but really happy and proud of all his accomplishments this year

Many of you who follow my blog might be familiar with this idea from last year's end of the year Teacher gift.  In order to thank Tyler's teacher and assistant, I made to gift card bouquets for each of them.  I got the idea from Disney Family Fun magazine.  I had other interested parents send me gift cards to include in the bouquet.  Here's how I made it:


I used the scalloped circle from "Accent Essentials" cartridge cut at 3.5" and the three flower layers are from "Plantin SchoolBook" cartridge, cut at 3", 2.75", 2.15".  I used a pencil to curl the edges up and used adhesive to stick the layers together.

The gift card envelope that the flowers are attached to is from the "Sweethearts" cartridge.  The dimensions are 7.15" wide x 3.30" high.  Once these were assembled, I attached the flowers that I made.  You could most certainly could use it with a Big Shoot or Cuttlebug and some of your favorite flower dies to create these as well.

Finally, I spray painted some bamboo skewers green and attached18 gauge wire to the skewers.  This made it more sturdy than last year's gift.  I then slipped the gift card flower envelopes to 18 gauge floral wire that I coiled at one end.  During this step, I also added the children's names to each of the gift cards.  I printed these out from the computer, punched them out and then attached with some hemp twine.


Here are some pictures of the other arrangement made for the assistant.  


I think any person would love to receive this special arrangement.  I hope this inspires some great ideas for you all, I am really enjoying these paper flowers.


Saturday, October 1, 2011

World Card Making Day - Birthday Card


We are making more cards for World Card Making Day, I am participating with Inking It Up Crazy in several challenges she is having today.  If you missed my first post, check out my Holiday Card.  Our next card is one of my favorite cards to make, a Birthday Card.

This Birthday Card was made using the "B is for Boy" cartridge for the cute dog.  The grass is cut from the Plantin SchoolBook cartridge and the word bubble is from Create a Critter cart.  I used the Cuttlebug and the distressed stripes folder on the red background and added some yellow stitching   
.


There is more to come each hour, so check back at Inking It Up Crazy for more challenged and giveaways.
Happy Card Making,
Melanie

Saturday, September 24, 2011

Wild AND Fabulous Blog Hop


Welcome to Melanie Makes and the WILD AND FABULOUS Blog Hop!!! Today we are sharing some super fun and super girly projects with you!

If you've come from visiting Kassidy's Inking It Up Crazy thanks for hopping along!! If you're just visiting and would like to start from the beginning you can go to http://www.inkingitupcrazy.blogspot.com. You will want to check out each blog for some great ideas and some sweet blog candy. 

For those who know me, making a girly project is actually a difficult task for me. Most of my projects involve making cards, gifts and party decorations for my two boys.  I believe God has blessed my with boys, so I don't have to navigate into the world of pink.  My sister on the other hand has four beautiful girls and I am lucky to be their Aunt.  So today's inspiration if for one of my nieces who is a girly girl. 


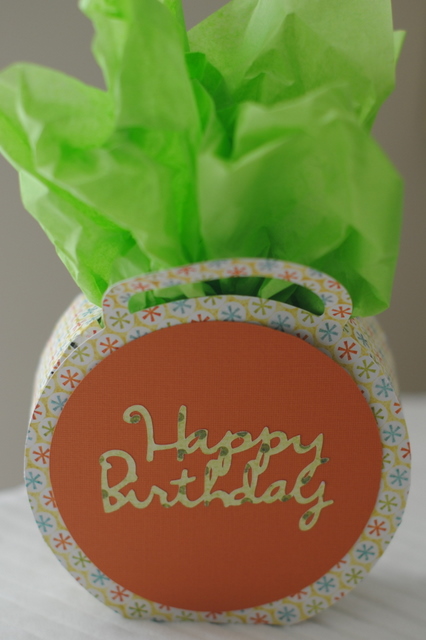
For this project, I decided to use the Tags, Bags, Boxes and More cartridge that came with my Gypsy.  I choose the cute little purse and sized it to fit 3" x 3" note cards.  I used the Plantin SchoolBook cartridge for the flower along with some EK Success flower punches.  I also made a set of four 3" x 3" coordinating note cards & envelopes.  I think this would make the perfect gift for any girl big or small.


Thanks for stopping by the Wild AND Fabulous Blog Hop.  Finally for my blog candy I will be giving away this decorative "Thanks for all that you do!" note pad.   In order to qualify please become a follower and leave me a comment.  I announce a winner on Monday.


Your next stop is Hailey. Check it out and see what she has to show you today!!!

And here’s the order of the hop in case you need it along the way!


Friday, June 3, 2011

End of the Year Teacher Bouquet


I can't believe my son had his last day of preschool this week, the school year has really gone by quickly.  Now let's hope that I survive the summer with my two busy boys.
To thank Tyler's teacher and assistant, I made to gift card bouquets for each of them.  I got the idea from Disney Family Fun magazine.  I had other interested parents send me gift cards to include in the bouquet.  Here's how I made it:
I used the scalloped circle from "Accent Essentials" cartridge cut at 3.5" and the three flower layers are from "Plantin SchoolBook" cartridge, cut at 3", 2.75", 2.15".  I used a pencil to curl the edges up and used adhesive to stick the layers together.

The gift card envelope that the flowers are attached to is from the "Sweethearts" cartridge.  The dimensions are 7.15" wide x 3.30" high.  Once these were assembled, I attached the flowers that I made.

Finally, I attached the gift card flower envelopes to 18 gauge floral wire that I coiled at one end.  I maybe would get a little thicker gauge wire next time, some of them were a little top heavy.

I think any person would love to receive this special arrangement.  I hope this inspires some great ideas for you all, I am really enjoying these paper flowers.

Melanie


Friday, May 6, 2011

Teacher Appreciation Card

To go along with our Teacher Appreciation gift to Mrs. Heather, I made this simple card.  Nothing to fancy since I had only a little time to make it, but I am pleased with it. 

I used the Plantin Schoolbook cartridge for the Apple and the squigly line.  I typed up, "Mrs. Heather my Teacher" on our computer and printed it out on white card stock.

Have a good Mother's Day weekend!

Melanie 

Friday, February 11, 2011

Spring is around the corner!

Alright, so we aren't quite at Spring yet.  I can hope though can't I?  I made this flower card for a My Pink Stamper Challenge.  I think with all the snow that they have gotten in OK they are ready for an early Spring.  Let's hope the ground hogs prediction is correct.

I made this flower card with the help of my wonderful Gypsy again.  I love that I can do so much more with the Expression and can design my own creations with it. 

The size for the scalloped card base is 4.25"  The layer on top of that is 4.25", I used my Gypsy to hid the interior layer.  The next layer is just the reverse of the previous layer.  These flowers were from the Accent Essentials cart.  The next flowers were cut from the Plantin Schoolbook cart.  First at 4" and the same flower cut twice at 3" each.  The center of the flower is from Create a Critter.  I again used my gypsy to turn of the center.  These were cut at 1.5" and 1.25".  To finish it off I used a button and sewed it to the paper with some cross stitch floss.  I also used my bone folder to slightly curl the petals. 

I can't wait to send this to someone, but meanwhile I will enjoy looking at in on my shelf. 
Here's to an early Spring!
Melanie

Tuesday, February 1, 2011

Inching for Love Valentine


Since I have been making some Valentine for my husband and sons' I though the grandparents would like to receive one too.  I created this card with adorable little caterpillar with the saying, "Inching for Love". 
The cute caterpillar is from the Stretch Your Imagination cartridge.  I made my own little heart board with my Gypsy and the heart was from the Plantin Schoolbook.  I used the same heart for the background.  I used my computer to print out the "Inching for Love" sentiment.  I hope the grandparents will like them.


Have a good week!
Melanie

Tuesday, January 4, 2011

My Pink Stamper Design Team 2011 Challenge

So, I have only been using my Cricut Expression for a few days now and I am going to be entering my first submission in becoming a design team member for Robyn's, "My Pink Stamper".  I have been following her for several months and if you are interested you can find here at http://www.mypinkstamper.com/ .  Robyn has proposed the following challenge:

To make a card, scrapbook page, or other Cricut project with your favorite cartridge using Robyn's favorite colors; pink, green, brown and an optional color of our choice.

I decided to use the "Paper Pups" cartridge along with the grass from the "Plantin SchoolBook" cartridge for my niece's Happy Birthday card.  Both of these came with my Cricut machine.  For the base of my card I used a 8 1/2" x 5 1/2" piece of  Dark Brown cardstock which I folded in half making a 5 1/2" x 4 1/4" card.  Next, I adhered a 5 1/8" x  3 7/8" piece of Bubble Gum cardstock and a 4 3/4" x 3 5/8" piece of Blue cardstock together.  I sewed a decorative pink zig-zag stitch around the top and two sides.  Then I attached the three layers of green grass that were cut from the "Plantin SchoolBook" cartridge along with the green ribbon at the bottom of the grass.  The card was then ready for the playful birthday pup, presents and happy birthday from the "Paper Pups" cartridge.  Finally, adhere this portion to the Dark Brown card stock and Voila you have the cutest birthday card.  Next project is to create my son, Bryan's, first birthday invitation. 


Cutting Machine:
Cricut Expression
Cartridges:
Paper Pups
Plantin SchoolBook
Cardstock:
The Paper Company - Dark Brown from the Cypress Fashion Colors pack
The Paper Studio - Medium Brown from the Earthtone pack
AC Moore - Spring Green, Grass Green, Blush, Bubble Gum, Blue
Embellishments:
Hobby Lobby - Scrap Pack Ribbon
Clark's Pink Thread

Monday, January 3, 2011

My newest crafting obsession...

I have been wanting one of these for awhile and I finally got my wish for Christmas this year, I received the Cricut Expression from Santa.  I am sure many of you are, "What the heck is a Cricut and What does it do?".  My  husband was one of them and couldn't figure out what I was going to do with it.  I have been antsy to get started, but the family has been under the weather with colds so I am just getting the chance to test it out.  My first creation was making a small gift bag for my niece's birthday present.  I think it turned out really cute and was a really quick project.